
Tools Needed:
Push pin Pliers
Small flathead screwdriver
Wrenches(depending on bolt size)
Ratchet and Sockets(depending on bolt socket)
Brake Fluid
1/4 clear hose
Step one:
Remove brake line bolt.
Step two:
Remove master cylinder from handlebars.
Step three:
Remove top of master cylinder container and drain brake fluid from master cylinder.

Step four:
Remove brake lever from the master cylinder.

Step five:
Remove rubber guard on the piston.

Step six:
Remove clip using pliers from the piston.

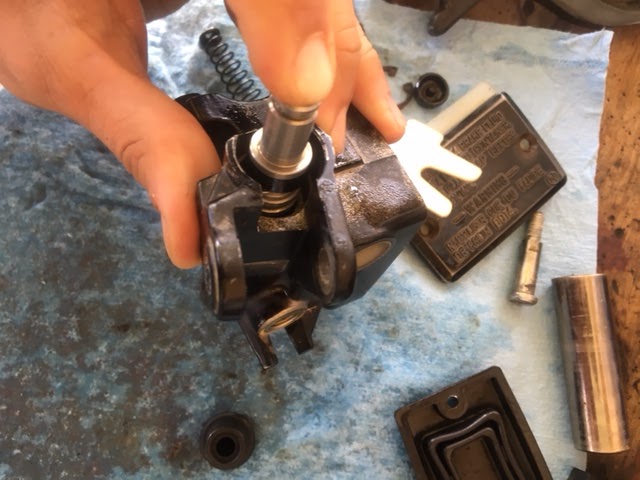
Step seven:
Remove the piston, spring and rubber seal.

Step eight:
Get the new piston kit and take out all the parts, clean out the master cylinder well before putting new parts in. Also, do not forget to lubricate it with brake fluid.

Step nine:
Push on the new seal onto piston using the small screwdriver and brake fluid as lubrication.

Step ten:
Put the rubber seal onto the spring and put the spring back into the bore.


Step eleven:
Put the piston back into the bore and push it all the way in.

Step twelve:
Using the plier put the new clip in the cylinder bore while pushing down the piston.
Step thirteen:
Put the rubber guard back onto the piston.
Step fourteen:
Assemble everything together and bleed the brakes.

Push pin Pliers
Small flathead screwdriver
Wrenches(depending on bolt size)
Ratchet and Sockets(depending on bolt socket)
Brake Fluid
1/4 clear hose
Step one:
Remove brake line bolt.
Step two:
Remove master cylinder from handlebars.
Step three:
Remove top of master cylinder container and drain brake fluid from master cylinder.

Step four:
Remove brake lever from the master cylinder.

Step five:
Remove rubber guard on the piston.

Step six:
Remove clip using pliers from the piston.

Step seven:
Remove the piston, spring and rubber seal.

Step eight:
Get the new piston kit and take out all the parts, clean out the master cylinder well before putting new parts in. Also, do not forget to lubricate it with brake fluid.

Step nine:
Push on the new seal onto piston using the small screwdriver and brake fluid as lubrication.

Step ten:
Put the rubber seal onto the spring and put the spring back into the bore.


Step eleven:
Put the piston back into the bore and push it all the way in.
Step twelve:
Using the plier put the new clip in the cylinder bore while pushing down the piston.
Step thirteen:
Put the rubber guard back onto the piston.
Step fourteen:
Assemble everything together and bleed the brakes.
